 English
Needs Browser Login - Workaround
Step by step instructions for logging in accounts that have been restricted to browser login.
I am wondering why people seriously keep lobbying for using smartphones as the primary means of (online) identity management. Those things only work in conjunction with a Google (Apple, Microsoft) account and it is ridiculously easy to loose access to that with no way of recovery. Speaking of not being able to log in: recently, the NeedsBrowser error has become an issue again.
In a nutshell, the NeedsBrowser error means that Google has restricted the account to browser login, so it can run a bit of JavaScript code in order to ensure, the account is not used on a bot network (I don’t see how this would actually stop any reasonable bot farm, but hey, at least, it also makes life difficult for users of third party clients…). There is no way to remove the flag, you have to play along.
On Android, browser login is seamless, as apps can easily embed a browser view and retrieve the session token from the cookie manager. On a desktop PC, this has to be done manually.
For technical reasons, the browser login flow cannot be implemented in Raccoon directly at this time, so you’ll have to use DummyDroid instead for now. IMPORTANT: DummyDroid now opens Raccoon’s database files directly, meaning, you cannot run both programs simultanously (the one you start second will simply hang, trying to get a lock).
Logging in an existing Raccoon profile
- Select the profile you want to login from the menu ☰ File > Open . The datasheet form does not need (in fact: should not) be filled in this case.
- Use the menu shortcut ☰ Go > Web login to open the login website in your browser.
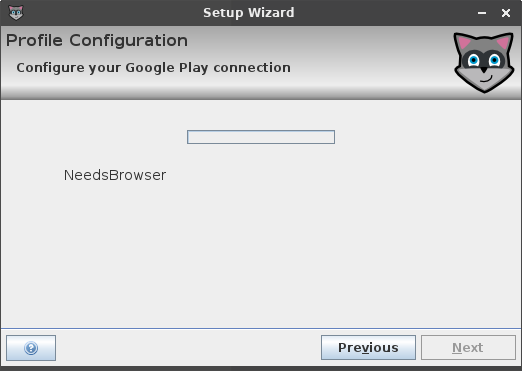
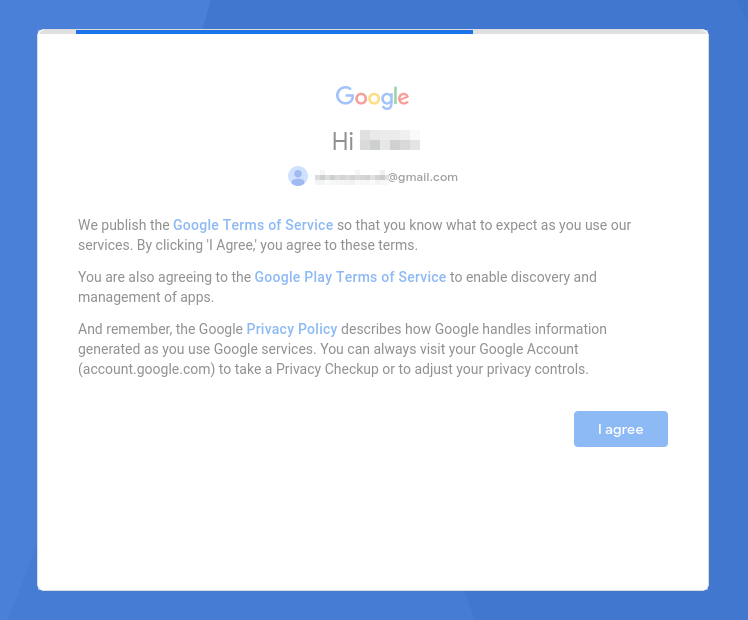
- Log the account in. You may be asked to accept a TOS, accepting is mandatory. You should finally arrive on what appears to be a loading screen. Nothing is actually loaded here. The page is normally shown embedded in an app and just waiting to be closed.
- Open your Browser’s cookie manager an copy the value of the oauth_token from the accounts.google.com domain to the clipboard.
- Switch back to DummyDroid and paste the oauth_token into ☰ Uplink > Web login flow dialog. IMPORTANT: the cookie is one time use only and will expire within a minute, so time is of the essence with this step! Confirm that the account was logged in successfully by checking the the output in the Uplink terminal.
- OPTIONAL: if you haven’t done so already, upgrade your Raccoon installation to Raccoon Premium. Otherwise, you will have to do the next step manually.
- Save your profile to the Raccoon database ☰ File > Save . Close DummyDroid and start Raccoon.
Creating a new Raccoon profile
The process is much the same as logging in an existing account, except that you need to to create a fresh GSF ID as well.
- Fill in the the datasheet you can either do that by probing a device connected via USB cable or selecting a build-in datasheet from the menu ☰ Edit > Datasheet Catalog .
- Enter username and password (required, even though DummyDroid can’t log the account in itself).
- Follow steps 2 to 5 from the previous section.
- Upload the datasheet and register a new GSF ID ☰ Uplink > Register GSF ID .
- Follow steps 6 and 7 from the previous section.
IMPORTANT: If you omit step 4, DummyDroid will save an incomplete profile and Raccoon will claim that it is not logged in. You cannot recover from this, by trying to edit the profile. You have to start over with a fresh one.
 Comment
 Subscribe
 Latest Blog Posts